It’s been a long time since the last update! In all honesty, the first Progress Report set the bar a little bit too high, and I found it difficult to sit down and put together monthly reports that would do it justice. So, going forward, we’re going to be providing shorter-form updates while striving to keep a monthly schedule.
That said, a lot has happened in the past few months, so strap in for a bigger update this time!
Core bring-up upstreamed into Linux 5.13
The core bring-up work that we detailed in our our first progress report was upstreamed and released on June 27 as part of Linux 5.13! This is not very useful for end-users at this early stage, but it represents months of work laying down a foundation and figuring out how to solve certain difficult problems in a way that is acceptable to the upstream kernel community. This has also gotten members of the kernel community interested in our project. This is important, as having a good relationship with kernel veterans is critical to ensuring we can work together to keep things upstreamed as development moves forward.
Hardware Reverse Engineering with the m1n1 Hypervisor
The M1 represents a massive reverse engineering challenge, with lots of bespoke, completely undocumented hardware. One approach to reverse engineering hardware is blind probing, as we used to reverse engineer the Apple Interrupt Controller, but this doesn’t really work for more complicated hardware.
In order to properly understand how to drive the hardware, we have to look at the only piece of documentation that exists: macOS itself. It would be technically possible to disassemble and reverse engineer the macOS drivers themselves, but this poses legal challenges that could put the copyright status of our project in jeopardy, as well as being inefficient since a lot of the code is specific to the macOS driver framework and doesn’t give us any useful information about the hardware.
Instead, a much safer approach that has been used by projects such as Nouveau in the past is to record a log of the hardware accesses that the official drivers perform on a real system, without actually looking at the code. Nouveau accomplished this by using a Linux driver to intercept accesses by Nvidia’s official Linux driver. Of course, Apple’s M1 drivers are for macOS, not Linux. While we could implement the same approach with a custom patch to the open source core of the macOS kernel, we decided instead to go one level deeper and build a hypervisor that can run the entirety of macOS, unmodified, in a VM that transparently presents it the real M1 hardware.
This is very different from a typical virtual machine, which is designed to run a guest OS on top of a host OS, with a full set of virtualized hardware. Our hypervisor, which is built on our m1n1 bootloader and hardware experimentation tool, is a completely bespoke implementation. It is designed to mostly stay out of the way of the guest OS, running it in an environment as close to bare metal as possible, while just transparently intercepting and logging hardware accesses. Thus, macOS “sees” the real M1 hardware, and interacts with it as normal - complete with a full accelerated desktop.
Since the hypervisor is built on m1n1, it works together with Python code running on a separate host machine. Effectively, the Python host can “puppeteer” the M1 and its guest OS remotely. The hypervisor itself is partially written in Python! This allows us to have a very fast test cycle, and we can even update parts of the hypervisor itself live during guest execution, without a reboot.
The hypervisor also includes standard debugging tools (like stopping execution, single-stepping, and getting a backtrace). This makes it not just useful for reverse engineering, but also as a low-level debugging tool for m1n1 itself and Linux, since they can also run on the hypervisor. Yes, you can now run m1n1 on m1n1!
If you’re intererested in the inner workings of the hypervisor, I did a 3-hour code recap stream covering most of the implementation, as well as the general topics of ARMv8-A virtualization, M1-specific details and oddities, and more.
On top of the hypervisor, we’ve built a flexible hardware I/O tracing framework that allows us to seamlessly load and upload tracers that understand how a particular piece of hardware works. For example, the tracer for the GPIO (General Purpose I/O) hardware can tell us when macOS toggles the state or configuration of each GPIO pin. This allows us to build up our understanding of the hardware, from raw register reads and writes to higher level functions. This was invaluable for the next bit of hardware we tackled: the DCP.
Reverse Engineering DCP
One of the biggest challenges for Asahi Linux is making the M1’s GPU work. But what most people think of as a “GPU” is actually two completely distinct pieces of hardware: the GPU proper, which is in charge of rendering frames in memory, and the display controller, which is in charge of sending those rendered frames from memory to the display.
While Alyssa has been hard at work reverse engineering the userspace components of the GPU, from draw calls to shaders, we still haven’t looked at the lowest levels of the hardware that handle memory management and submission of commands to the GPU. But before we can use the GPU to render anything, we need a way to put it on the screen! Up until now, we’ve been using the firmware-provided framebuffer, which is just an area of memory where we can write pixels to be shown on the screen, but this won’t cut it for a real desktop. We need features such as displaying new frames without tearing, support for hardware sprites such as the mouse cursor, switching resolutions and configuring multiple outputs, and more. This is the job of the display controller.
On most mobile SoCs, the display controller is just a piece of hardware with simple registers. While this is true on the M1 as well, Apple decided to give it a twist. They added a coprocessor to the display engine (called DCP), which runs its own firmware (initialized by the system bootloader), and moved most of the display driver into the coprocessor. But instead of doing it at a natural driver boundary… they took half of their macOS C++ driver, moved it into the DCP, and created a remote procedure call interface so that each half can call methods on C++ objects on the other CPU! Talk about overcomplicating things…
Reverse engineering this is a huge challenge, but thanks to the hypervisor, we can build up our understanding of how this all works layer by layer. At the lowest layer, DCP is an instance of what apple calls an “ASC”, which is their term for these coprocessors (the M1 has about a dozen!). ASC processors run their own firmware and communicate with the main CPU through a mailbox interface, which is a simple message queue where each side can send 64-bit messages to the other, tagged with an “endpoint”.
Above this simple interface, Apple uses a shared set of endpoints for all ASC processors that run RTKit, Apple’s bespoke RTOS. This interface provides features such as sending syslog messages and crash dumps from the ASC to the main CPU, and initializing endpoints (services). So we built a tracer that can understand these messages, and do things like print the syslog messages directly to the hypervisor console.
On top of this, the DCP implements multiple endpoints, one of which serves as the “main” interface. This interface itself supports making remote method calls in both directions. The DCP often issues synchronous callbacks to the main CPU after it receives a call, and the main CPU can in turn issue more synchronous DCP calls - effectively, the execution call stack extends across the CPU-to-DCP boundary! The interface even supports asynchronous reentrancy, having multiple “channels” so that, for example, the DCP can send asynchronous messages to the main CPU at any time, even during another operation.
The method calls themselves send their arguments and return data via buffers in shared memory. These buffers encode simple types like integers; pointers that can pass data in the input, output, or both directions; more complex fixed structures; and even two different serialization formats for JSON-like higher-level data structures (blame IOKit)! Our dcp tracer takes these buffers and dumps them out to a trace file, so that they can be analyzed offline as we improve our understanding of the protocol.
We then started building a Python implementation of this RPC protocol and marshaling system. This implementation serves a triple purpose: it allows us to parse the DCP logs from the hypervisor to understand what macOS does, it allows us to build a prototype DCP driver entirely in Python, and it will in the future be used to automatically generate marshaling code for the Linux kernel DCP driver.
Passing the hypervisor DCP traces through this decoder, we can get a trace of all the method calls that are exchanged between macOS and the DCP:
>C[0x0] A401 IOMobileFramebufferAP::start_signal()
  <d[0x0] D598 IOMobileFramebufferAP::find_swap_function_gated()
  >d[0x0] D598 IOMobileFramebufferAP::find_swap_function_gated()
  <d[0x0] D107 UnifiedPipeline2::create_provider_service()
  >d[0x0] D107 UnifiedPipeline2::create_provider_service() = True
  [...]
  <d[0x0] D000 UPPipeAP_H13P::did_boot_signal()
  >d[0x0] D000 UPPipeAP_H13P::did_boot_signal() = True
  <d[0x0] D001 UPPipeAP_H13P::did_power_on_signal()
  >d[0x0] D001 UPPipeAP_H13P::did_power_on_signal() = True
  <d[0x0] D116 UnifiedPipeline2::start_hardware_boot()
    >C[0x40] A357 UnifiedPipeline2::set_create_DFB()
    <C[0x40] A357 UnifiedPipeline2::set_create_DFB()
    >C[0x40] A443 IOMobileFramebufferAP::do_create_default_frame_buffer()
    <C[0x40] A443 IOMobileFramebufferAP::do_create_default_frame_buffer() = 0
    >C[0x40] A103 UPPipe2::test_control(cmd=0, arg=2863267840)
    <C[0x40] A103 UPPipe2::test_control(cmd=0, arg=2863267840) = 4638564681600
    >C[0x40] A029 UPPipeAP_H13P::setup_video_limits()
      <d[0x40] D107 UnifiedPipeline2::create_provider_service()
      >d[0x40] D107 UnifiedPipeline2::create_provider_service() = True
      <d[0x40] D401 ServiceRelay::sr_get_uint_prop(obj='PROV', key='minimum-frequency', value=0)
      >d[0x40] D401 ServiceRelay::sr_get_uint_prop(obj='PROV', key='minimum-frequency', value=0) = False
      <d[0x40] D107 UnifiedPipeline2::create_provider_service()
      >d[0x40] D107 UnifiedPipeline2::create_provider_service() = True
      <d[0x40] D408 ServiceRelay::sr_getClockFrequency(obj='PROV', arg=0)
      >d[0x40] D408 ServiceRelay::sr_getClockFrequency(obj='PROV', arg=0) = 533333328
      <d[0x40] D300 PropRelay::pr_publish(prop_id=38, value=470741)
      >d[0x40] D300 PropRelay::pr_publish(prop_id=38, value=470741)
      <d[0x40] D563 IOMobileFramebufferAP::setProperty_int(key='MaxVideoSrcDownscalingWidth', value=27582)
      >d[0x40] D563 IOMobileFramebufferAP::setProperty_int(key='MaxVideoSrcDownscalingWidth', value=27582) = True
      <d[0x40] D563 IOMobileFramebufferAP::setProperty_int(key='VideoClock', value=74250000)
      >d[0x40] D563 IOMobileFramebufferAP::setProperty_int(key='VideoClock', value=74250000) = True
      <d[0x40] D563 IOMobileFramebufferAP::setProperty_int(key='PixelClock', value=533333328)
      >d[0x40] D563 IOMobileFramebufferAP::setProperty_int(key='PixelClock', value=533333328) = True
    <C[0x40] A029 UPPipeAP_H13P::setup_video_limits()
    >C[0x40] A463 IOMobileFramebufferAP::flush_supportsPower(arg0=True)
    <C[0x40] A463 IOMobileFramebufferAP::flush_supportsPower(arg0=True)
    >C[0x40] A036 UPPipeAP_H13P::apt_supported()
    <C[0x40] A036 UPPipeAP_H13P::apt_supported() = False
    >C[0x40] A000 UPPipeAP_H13P::late_init_signal()
      <d[0x40] D003 UPPipeAP_H13P::rt_bandwidth_setup_ap(config=<out>)
      [...]
    <C[0x40] A000 UPPipeAP_H13P::late_init_signal() = True
    >C[0x40] A460 IOMobileFramebufferAP::setDisplayRefreshProperties()
      <d[0x40] D561 IOMobileFramebufferAP::setProperty_dict(key='IOMFBDisplayRefresh', value=...)
        value = {'displayMinRefreshInterval': 71582788,
                 'displayMinRefreshIntervalMachTime': 399984,
                 'displayMaxRefreshInterval': 178956970,
                 'displayMaxRefreshIntervalMachTime': 999984,
                 'displayRefreshStep': 0,
                 'displayRefreshStepMachTime': 0}
      >d[0x40] D561 IOMobileFramebufferAP::setProperty_dict(key='IOMFBDisplayRefresh', value=...) = True
    <C[0x40] A460 IOMobileFramebufferAP::setDisplayRefreshProperties() = True
  >d[0x0] D116 UnifiedPipeline2::start_hardware_boot() = True
  <d[0x0] D122 UnifiedPipeline2::setDCPAVPropStart(length=5821)
[... thousands more lines of initialization and kilobytes of serialized data ...]
And armed with this knowledge of how everything fits together, we can implement enough of the interface to finally send display buffer swaps to the display. This allows us to implement tear-free graphics with double buffering, hardware mouse pointer acceleration, framebuffer scaling and compositing, and more!
The first frame presented using the prototype DCP driver (screenshot taken via HDMI capture)
As a further twist, the DCP interface is not stable and changes every macOS version! This finally answers a question for the Asahi Linux project: we will only support specific firmware versions. Unlike macOS, which can afford to support only its “paired” firmware and change with every release, Linux has to support all firmware versions going back to the initial supported one, in order to allow people to upgrade their kernel without upgrading their firmware in tandem. It would be too much of a maintenance nightmare to attempt to support every DCP firmware version that Apple releases, so instead we will pick certain “golden” firmware versions that are blessed to be supported by Linux. Don’t fret: this doesn’t mean you won’t be able to upgrade macOS. This firmware is per-OS, not per-system, and thus Linux can use a different firmware bundle from any sibling macOS installations.
For the initial kernel DCP support, we expect to require the firmware released with macOS 12 “Monterey” (which is currently in public beta); perhaps 12.0 or a newer point release, depending on the timing. We will add new supported firmware versions as we find it necessary to take advantage of bugfixes and to support new hardware.
The silver lining of using this complicated DCP interface is that DCP does in fact run a huge amount of code – the DCP firmware is over 7MB! It implements complicated algorithms like DisplayPort link training, real-time memory bandwidth calculations, handling the DisplayPort to HDMI converter in the Mac mini, enumerating valid video modes and performing mode switching, and more. It would be a huge ordeal to reverse engineer all of this and implement it as a raw hardware driver, so it is quite likely that, in the end, we will save time by using this higher-level interface and leaving all the dirty work to the DCP. In particular, it is likely that newer Apple Silicon chips will use a shared DCP codebase and the same interface for any given macOS version, which gives us support for newer chips “for free”, with only comparatively minor DCP firmware ABI updates.
In case you’re wondering, no, we can’t write our own firmware, as it is loaded by iBoot before it hands control over to the OS, and it is signed by Apple. However, we do have access to the raw display controller registers too, which gives us some leeway to implement features and tricks that the DCP firmware itself does not support. The firmware also runs safely behind an IOMMU, which means you do not have to trust Apple; it can’t compromise or backdoor your system (unlike the infamous Intel Management Engine).
Building an installer
Those of you adventurous enough to try to test out m1n1 and our Linux patches by yourselves will have likely run into our Developer Quickstart guide. It describes a dense and tedious manual installation process.
In order for an OS to be bootable on Apple Silicon machines, it has to “look” like a real macOS installation. This means it has to be an APFS container with multiple volumes within it, containing specific directory structures and files. Until now, the simplest way of doing this was to actually install macOS a second time in a separate partition, and then replace its kernel with m1n1. This is, needless to say, a major pain in the ass, as the installation process is fairly slow. It also wastes around 70GB of disk space, which is how much you need for an upgradable macOS install. It also makes it difficult to install a specific macOS version, which is going to become a problem once we start requiring the usage of specific firmware bundles. This clearly won’t cut it for anything beyond early development.
What we need is a way to create a “macOS” installation from scratch, containing the required bootloader components and metadata for Apple’s tooling to recognize it as a bootable OS. It doesn’t have to contain an actual macOS root filesystem, but it does require these components:
- Version information and metadata files
- iBoot2 and its configuration, including the device tree
- OS-paired firmware (for things like DCP, AGX, etc)
- The macOS recovery environment (a ~1GB macOS system image)
- m1n1 installed as a custom kernel, overriding the macOS XNU kernel
- Files related to user authentication for recovery operations
To do this, we built a prototype installer that can replicate this part of the macOS installation process, and guide the user through the process of installing m1n1. It uses Apple’s official restore images, which they make available for every macOS release on Apple Silicon. Instead of downloading the 13+GB full OS image, it streams only the necessary components (the largest one being the 1GB recovery image) on demand.
To launch the installer, the user just runs a shell script (curl | sh style) from either macOS or Recovery mode and follows the prompts:
# curl https://..... | sh
  % Total    % Received % Xferd  Average Speed   Time    Time     Time  Current
                                 Dload  Upload   Total   Spent    Left  Speed
100   564  100   564    0     0  70500      0 --:--:-- --:--:-- --:--:-- 70500

Bootstrapping installer:
  Downloading...
  Extracting...
  Initializing...


Welcome to the Asahi Linux installer!

This installer is in a pre-alpha state, and will only do basic
bootloader set-up for you. It is only intended for developers
who wish to help with Linux bring-up at this point.

Please make sure you are familiar with our documentation at:
  https://alx.sh/w

Press enter to continue.


Collecting system information...
System information:
  Product name: Mac mini (M1, 2020)
  SoC: Apple M1
  Device class: j274ap
  Product type: Macmini9,1
  Board ID: 0x22
  Chip ID: 0x8103
  System firmware: iBoot-7429.30.8.0.4
  Boot UUID: DCBCA6BD-BFF1-4F8F-AE1A-6E937D2D4BDC
  Boot VGID: DCBCA6BD-BFF1-4F8F-AE1A-6E937D2D4BDC
  Default boot VGID: DCBCA6BD-BFF1-4F8F-AE1A-6E937D2D4BDC
  Boot mode: macOS
  OS version: 11.5.2
  Login user: marcan

Collecting partition information...
  System disk: disk0

Collecting OS information...

Partitions in system disk (disk0):
  1: APFS [Macintosh HD] (112.91 GB, 6 volumes)
    OS: [B*] macOS v11.5.2 [DCBCA6BD-BFF1-4F8F-AE1A-6E937D2D4BDC]
  2: APFS [macOS 12] (70.00 GB, 6 volumes)
    OS: [  ] macOS v12.0 [985C5BA1-4C81-4095-B972-99F7E8AB4CE5]
  3: (free space: 65.19 GB)

  [B ] = Booted OS, [R ] = Booted recovery, [? ] = Unknown
  [ *] = Default boot volume

Choose what to do:
  f: Install Asahi Linux into free space
  q: Quit without doing anything
Action (q): f

Using OS 'Macintosh HD' (disk0s2) for machine authentication.

Choose a free area to install into:
  3: (free space: 59.69 GB)
Target area: 3

Enter a name for your OS (Linux): Asahi Linux

Choose the macOS version to use for boot firmware:
(If unsure, just press enter)
  1: 11.4
  2: 11.5.2
Version (2):

Using macOS 11.5.2

Downloading OS package info...
.

Creating new stub macOS named Asahi Linux

Installing stub macOS into disk0s6 (Asahi Linux)
Preparing target volumes...
Checking volumes...
Beginning stub OS install...
++
Setting up System volume...
Setting up Data volume...
Setting up Preboot volume...
++++++++++++++++++
Setting up Recovery volume...
++++++++++++++++++++++++++++++++++++++++++++++++++++++++++++++
Stub OS installation complete.

When the Startup Disk screen appears, choose 'Asahi Linux'.
You will have to authenticate yourself.

Press enter to continue.


The system will now shut down.
To complete the installation, perform the following steps:

1. Press and hold down the power button to power on the system.
   * It is important that the system be fully powered off before this step,
     and that you press and hold down the button once, not multiple times.
     This is required to put the machine into the right mode.
2. Release it once 'Entering startup options' is displayed.
3. Choose Options.
4. Click on the Utilities menu and select Terminal.
5. Type the following command and follow the prompts:

/Volumes/'Asahi Linux'/step2.sh

Press enter to shut down the system.
This will eventually be available at our short domain https://alx.sh, but it is not deployed there yet. This is just a first prototype of the installer that only installs m1n1, which is very useful for developers who want to join us in our quest. Eventually, a more user-friendly version will also guide users through partitioning their drive for Linux, resizing macOS to make space, and installing their distribution of choice. Who knows, it might even become a graphical macOS app one day!
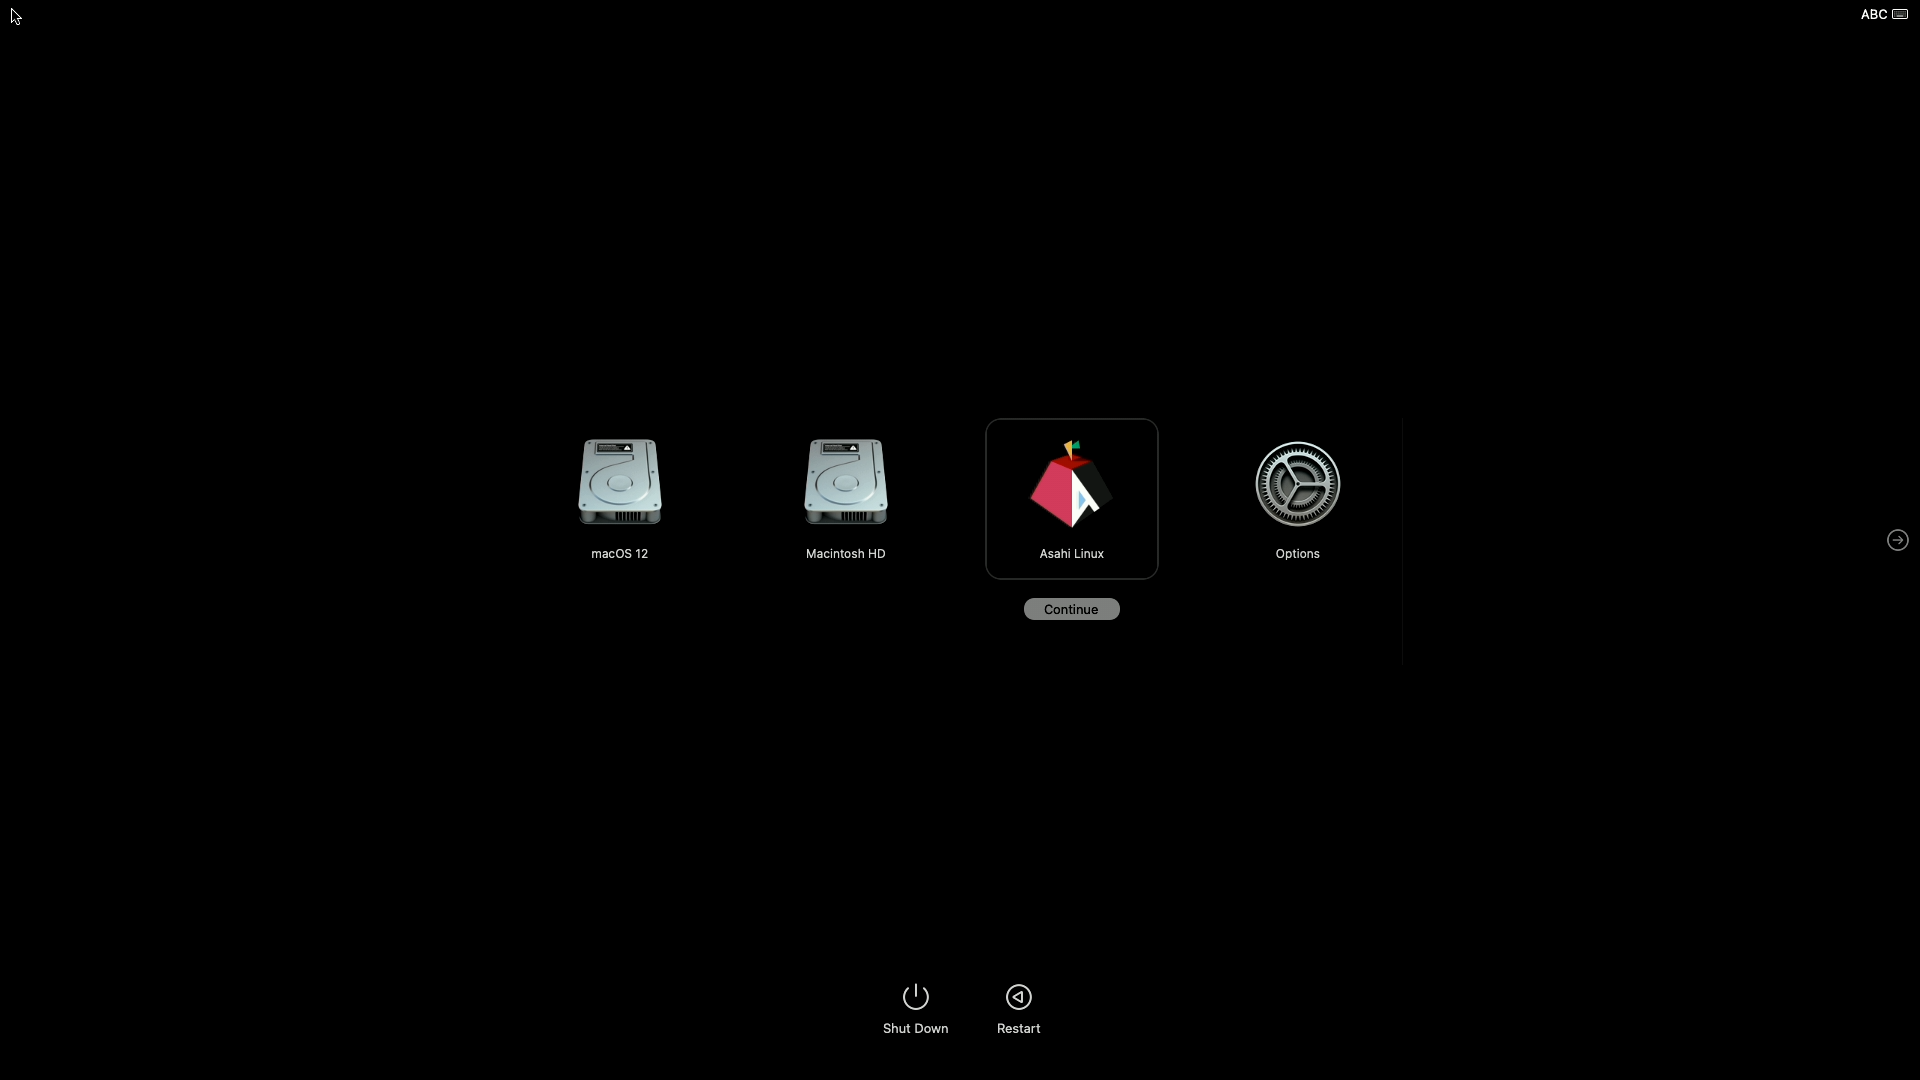
Triple-booting two versions of macOS and Asahi Linux with the built-in boot picker
More kernel drivers
Sven has been dutifully working on the Linux driver for DART, the M1’s IOMMU (I/O Memory Management Unit). This driver is required to make all kinds of hardware work, like PCIe, USB, DCP, and more. It has just been accepted by upstream and is now on its way to Linux 5.15!
With this driver in, we can now make USB and PCIe work with minimal additional patches and drivers. There are various other dependencies (GPIO for miscellaneous things, I²C for proper USB-PD support, SPI for touchpad/keyboard support on the laptops, and NVMe support patches) that are spread around in various trees that people have been working on. Next we’ll direct our focus towards polishing these simpler drivers and putting together a clean, working reference tree that we can use to continue development and provide new developers with a stable foundation. With the current state of things, it’s already possible to use Asahi Linux as a development machine with a (non-accelerated) GUI, although things are still rough around the edges. Upstreaming these changes will require a bit more time, as there are some bureaucratic yaks to be shaved around how to properly implement these (technically simple) drivers, but things shouldn’t take too long!
And once that’s on the way… it’s time to tackle the GPU kernel driver! Things are about to get exciting :-)